Overview
KiCAD is an Open Source EDA (Electronic Design Automation) suite, which I use for schematic capture and PCB layout. Like many other EDA tools that are floating around KiCAD can make 3D renderings of your circuit boards. If you use stock PCB symbols this is great; however, when you make your own PCB footprints you need to define your own 3d models.
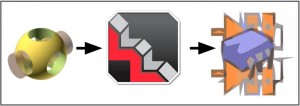
I personally find it convenient to utilize OpenSCAD to make 3D models of most eletrical components, which are simple and easily defined parametrically in OpenSCAD's language. OpenSCAD allows you to write code that translates directly to a 3D model and export this to an STL. However, KiCAD expects VRML files which can be easily generated in Wings3D (which can import STL files). On the plus side Wings3D will allow us to add color elements and surfaces for nice rendering by KiCAD.
However, there is one pretty terrible problem: Wings3D can't for the life of it read in STL files read by OpenSCAD. Actually, Wings3D will just crash. To fix this you can use meshconv; however, use of meshconv does require use of the command line (in either Windows, OS X or Linux). I can only vouch for its usability under Linux. This will modify our workflow a little bit, but not by much.
The question now is how does this workflow go down?
Workflow
My workflow is as follows:
- Get Datasheet of Footprint (not covered here)
- Make Footprint in KiCAD (not covered here)
- Using OpenSCAD model the component
- Export component as STL file (and use meshconv)
- Import STL in Wings3D
- Tweak and Export VRML File
- Import to KiCAD with proper scaling
- Enjoy your beautiful 3D models!
Using OpenSCAD Model the component
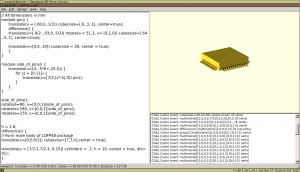
Modeling simple shapes inside of OpenSCAD is pretty easy and there are a few tricks to it. I may eventually write a tutorial for using OpenSCAD, but this will not be it. Learning OpenSCAD, unlike most CAD software, is essentially learning a programming language. I found the User Manual to be very useful. However, here are some tips.
- Use modules for everything, especially pins. They are similar to functions and can be reused, positioned and if designed right scaled.
- Math can be tricky, make sure you have a good concept of how primitives get moved around.
- When adapting a component follow the datasheet as closely as possible. Take into account your tolerances appropriately.
- OpenSCAD doesn't really have units. However, use consistent units yourself, because when we go to KiCAD we will scale.
Export component as STL file
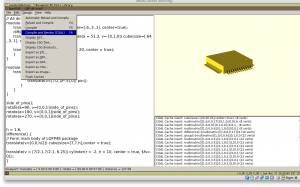
Now that we have an OpenSCAD model we need to export it. First, you need to do "Design >> Compile and Render GCAL", which will make our nice mesh model. Then you can export it as a STL file by using "Design >> Export as STL". You can take the STL file and 3d print it. This can be useful for testing placement and pin spacing of expensive parts on PCBs.
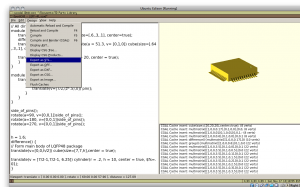
So save your STL as something that makes sense and lets take a road trip to Wings3D world!
Pit Stop: OpenSCAD STL Files Crash Wings3D
If you tried to import your OpenSCAD STL file into Wings3D then you will know this causes a crash. OpenSCAD STL files and Wings3D don't like each other. We need to use Princeton's meshconv to make OpenSCADs output STL acceptable for Wings3d. You can also directly generate VRML files, but this feature has never worked for me and I like using Wings3D to add color attributes to my models.
The following command will work fine for cleaning up the STL files:
$ meshconv -c stl INPUTFILE.stl -o OUTPUTFILE.stl
Import STL in Wings3D
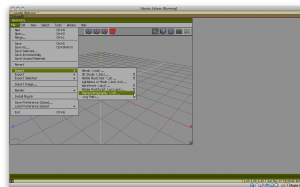
Open up Wings3D and select "File >> Import >> StereoLithography (.stl)" from the top menu. Done.
Tweak and Export VRML File
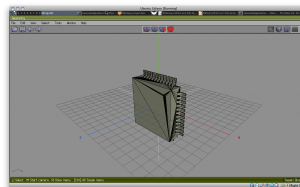
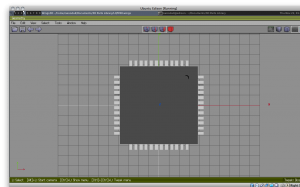
Once you have imported your STL file into Wings3D its all about making it look nice. I am not good at Wings3D, but I know how to make my components look passable.
To apply a texture (or as Wings3D calls it a Material) to something you need to set it up first. Make sure everything is unselected by hitting "space" and right click somewhere where there are no polygons and click Materials. I can't advise you on what material values you want. Most of the time you can just move the bars around until your model looks good. Once all of the materials are created they need to be applied.
To apply a Material you need to select all the polygons you want the material to be applied to. Then right click and apply the material by clicking material again and selecting the material you want. Getting a good selection can be tough due to the interface. I suggest taking a glance at the WikiBooks Wings3D Tutorial for further tips on getting a good selection and tweaking your models.
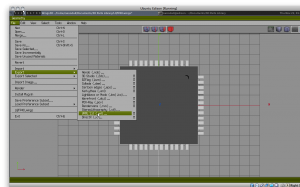
After your little black box looks good we can export it by selecting "File >> Export >> VRML 2.0 (.wrl)".
Import to KiCAD with proper scaling
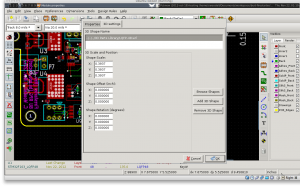
We are almost there. Open up your PCB layout right click on the module you want to add the 3D model to and edit the properties. Click "3D Settings" now "Browse Shapes" and find your 3D .wrl file and select it. I suggest putting your 3D files in a folder in your project directory (or better yet library directory). Once you have the shape imported you need to scale it and rotate it. Rotation is pretty easy to figure out, as is the scaling. If you did your work in mm you will need to scale by 0.393700 (1WU/2.54mm, where WU stands for Wings Units). If you worked in inches then you may need to scale a bit because 1 WU is equal to .1" by default.
Enjoy your beautiful 3D models!
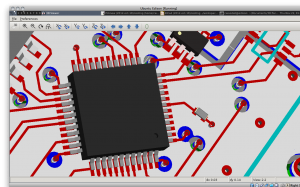
Now you have beautiful 3D models of your circuit boards that allow you to feel semi-competent around MechE's showing off their 3D models. To make yourself feel even better your 3D models have little traces of copper on them, thats pretty cool. To make things better you can export as a VRML file and bring your design anywhere a VRML file can be read! I am working on a method for going from KiCAD 3D models to AutoDesk Inventor and Solidworks, for including PCBs with all the components on in mechanical drawings.
You can get all of my OpenSCAD and Wings3d files here
EDIT: I finally found the 3D parts and have moved them to github to be distributed and managed there. Sorry to all for the inconvenience. Find them on GitHub
Hello,
a million thanks for this tutorial. You're opening a world of possibles!
Sebastien
Thanks for the article. Would you be willing to share your OpenSCAD file?
Yes! There was no particular reason I didn't share my OpenSCAD Files. I will get them up ASAP.
Finally added OpenSCAD files, sorry that took so long.
Awesome, thanks!
I'm looking for a way to do the reverse and export an STL containing the 3D representation of the board to use when designing cases etc in openSCAD (or any other program that allows you to import STL's I suppose) :)
Okay, did it with a little help from here: http://tech.groups.yahoo.com/group/kicad-users/message/9359
I wrote a quick how-to on my site too: http://ben-howes.co.uk/post/41877289456/importing-pcbs-from-kicad-in-openscad
By the way, the stl file needs to be in "Binary" format and not "ASCii" -- you can use MeshLab to resave as a quick way to prep the OpenSCAD file for Wings3D! Thanks for this helpful tutorial!
Hi, thank you for so detailed tutorial.
I've been playing with kicad & wings3d for a while, and now I'm thinking about doing internal equipment wiring (between boards, for example), something including auto wire layout, connector views, sql links to store the amount of wire used, etc.
Do you know of any live project regarding this subject?
Thank you very much, and please excuse me my poor english.-
Hi, good job.
Leave a donate botton to people give you a thanks in money, Â your job is very good.
I will share it at Brazil community, of course.
Thanks again.
Your files are down. Would you mind uploading them again? Thanks alot.
The OpenSCAD and Wings3d files are not accessible anymore / at the moment. Thanks for writing this tutorial.
I finally tracked down the files. My harddrive had some problems! They are on github now enjoy!
Hi,
Good tutorial.
While sometimes I also working with OpenScad, I prefer using SketchUp to make 3D model. To do this, install "Export to STL" plugin. Select the 3D model of interest, then export it with export to stl. The rest ... goes to Wings 3D ... maybe you need to scale down ( or up ) depends on the unit you use in the sketchup.
You can find the plugin / extention in this link : http://extensions.sketchup.com/content/sketchup-stl
Hope this tricks useful for sketchup user.
rgds / jbdx
I use to use SketchUp also but found dealing with "holes" was a big issue with complicated geometry. The last couple years I have moved almost exclusively to Fusion 360 which I absolutely love. I managed to get a copy under the hobbyist licensing that was initially offered which I am still using. Not sure if that is still available now but if it is I would definitely look into it as your STL/3D cad solution.
Thanks for the great writeup and suggested toolchain!